 |
| Wavy Cable Fingerless Mitts by Erica Knudson |


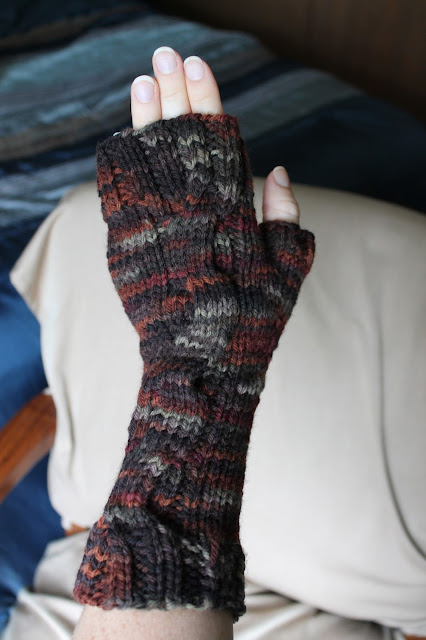
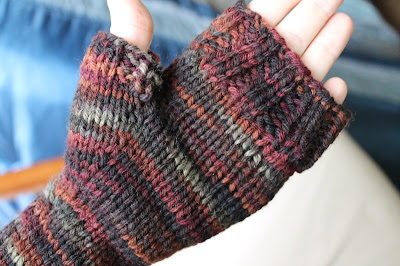
I designed these Wavy Cable Fingerless Mitts to compliment a hat from someone else’s pattern. There is one cable up the top of the arm & hand. The thumb gusset section requires a bit of concentration to count the increase rows and cable rows, but if you write down what row you’re on, you’re good to go! They are a size Women’s Medium.
Materials:
220 yards worsted weight yarn (photo here in Cascade Paints) This will most likely be too much yarn, but I wanted to give you a safe estimate.
Size 4mm (size 6) DPNs (5th needle used for cable, but you may also use a cable needle)
Stitch Markers
Waste yarn for holding stitches
Instructions (from the bottom up):
Cast on 40 sts, divide among three or four needles (your preference) and join, without twisting, in the round. If you prefer to use a stitch marker to mark the end of the round, place it here and move it up with each row.
Cuff FOR BOTH MITTENS:
Work k2, p2 ribbing for 8 rounds. – 40 sts
Next row; (k11, k2tog) 3 times, knit 1. – 37 sts
For the next 2 rows; k3, p1, k12, p1, k20. – 37 sts
Distribute sts on 3 needles as follows: Needle 1 = first 19 sts, Needle 2 = 9 sts, Needle 3 = 9 sts. The first needle, with 19 sts, will hold the cable pattern for both the right- and left-hand mittens, but the cable pattern is reversed for each mitt. For the cabling, you may choose to use the 5th DPN as a cable needle.
Arm, Thumb Gusset, and Hand FOR THE LEFT MITTEN:
Each row remains at a total of 37 sts until thumb gusset.
First cable row: k3, p1, C12F, p1, k2, k18.
For the next 8 rows: k3, p1, k12, p1, k2, k18.
Next row: k3, p1, C12B, p1, k2, k18.
For the next 8 rows: k3, p1, k12, p1, k2, k18.
Thumb Gusset FOR LEFT MITTEN:
For the next row: k3, p1, C12F, p1, k2, k17, pm, M1, pm, k1. – 38 sts
K3, p1, k12, p1, k2, k to end.
Next rows,
A. K3, p1, k12, p1, k2, k to first mkr, sm, M1, k to last mkr, M1, sm, k1. (The first time you do this, you will end with 3 sts between markers.)
B. For the next 2 rows: K3, p1, k12, p1, k2, k to end.
**Here’s the tricky part!!! You need to repeat rows A & B until you have 15 sts between markers, ending on the increase row A. AND…
While repeating these rows A & B, you need to include a Cable row on Needle 1, just like before, on every 9th row. Alternate Cable Front and Cable Back rows. It helps to have a note nearby to keep track of which row you are on. Here is an example of what would follow:
A(5 between mkrs)
B
B
A(7 between mkrs)
B(CB)
B
A(9 between mkrs)
B
B
A(11 between mkrs)
B
B
A(13 between mkrs)
B(CF)
B
A(15 between mkrs)
Hand FOR LEFT MITTEN:
Next row: k3, p1, k12, p1, k2, k to mkr, place the 15 thumb sts between mkrs on waste yarn or stitch holder, k1. – 37 sts
For the next 4 rows: k3, p1, k12, p1, k2, k18. – 37 sts
K3, p1, CB12, p1, k2, k18. – 37 sts
For the next 2 rows: k3, p1, k12, p1, k2, k18. – 37 sts
Arm, Thumb Gusset, and Hand FOR THE RIGHT MITTEN:
Each row remains at a total of 37 sts until thumb gusset.
First cable row: k2, p1, C12B, p1, k3, k18.
For the next 8 rows: k2, p1, k12, p1, k3, k18.
Next row: k2, p1, C12F, p1, k3, k18.
For the next 8 rows: k2, p1, k12, p1, k3, k18.
Thumb Gusset FOR RIGHT MITTEN:
For the next row: k2, p1, C12B, p1, k3, k1, pm, M1, pm, k17. – 38 sts
K2, p1, k12, p1, k3, k to end.
Next rows,
A. K2, p1, k12, p1, k3, k to first mkr, sm, M1, k to last mkr, M1, sm, k17. (The first time you do this, you will end with 3 sts between markers.)
B. For the next 2 rows: K2, p1, k12, p1, k3, k to end.
**Remember to use opposite cable rows for the Right mitt. Here is an example of what would follow:
A(5 between mkrs)
B
B
A(7 between mkrs)
B(CF)
B
A(9 between mkrs)
B
B
A(11 between mkrs)
B
B
A(13 between mkrs)
B(CB)
B
A(15 between mkrs)
Hand FOR RIGHT MITTEN:
Next row: k2, p1, k12, p1, k3, k1, place the 15 thumb sts between mkrs on waste yarn or stitch holder, k17. – 37 sts
For the next 4 rows: k2, p1, k12, p1, k3, k18. – 37 sts
K2, p1, CF12, p1, k3, k18. – 37 sts
For the next 2 rows: k2, p1, k12, p1, k3, k18. – 37 sts
Finish Hand FOR BOTH MITTENS:
(k11, kfb) 3 times, k1. – 40 sts
K2, p2 ribbing for 8 rows. – 40 sts
Bind off loosely in pattern.
Thumb FOR BOTH MITTENS:
Transfer the 15 sts from the waste yarn onto 3 needles. Join new yarn in-the-round and pick up 4 sts along the gaps. – 19 sts
Knit one round even until 2 sts remain, k2tog. – 18 sts
Knit 4 rounds in this ribbing; k2, p2 until last 2 sts of round, k1, p1. – 18 sts
Bind off loosely in pattern.
Finishing:
Weave in ends, using thumb ends to reinforce the sts around the thumb. Block if desired.
Key:
C12F = place the next 6 sts on the cable needle in front of the work, knit the next 6 sts and then knit the 6 sts from cable needle (cable appears to move to the left)
C12B = place the next 6 sts on the cable needle in back of the work, knit the next 6 sts and then knit the 6 sts from cable needle (cable appears to move to the right)
k = knit
k2tog = knit 2 together, a method of decreasing
mkr = marker
M1 = make one stitch, a method of increasing
p = purl
pm = place marker
sm = slip marker
St, sts = stitch, stitches